Simple, elegant DIY heart leather earrings that are sure to compliment any outfit! These earrings didn’t take long to make and they look really great with my valentines outfit this year. There are two versions of instructions on how to make these and all the links to the required supplies.

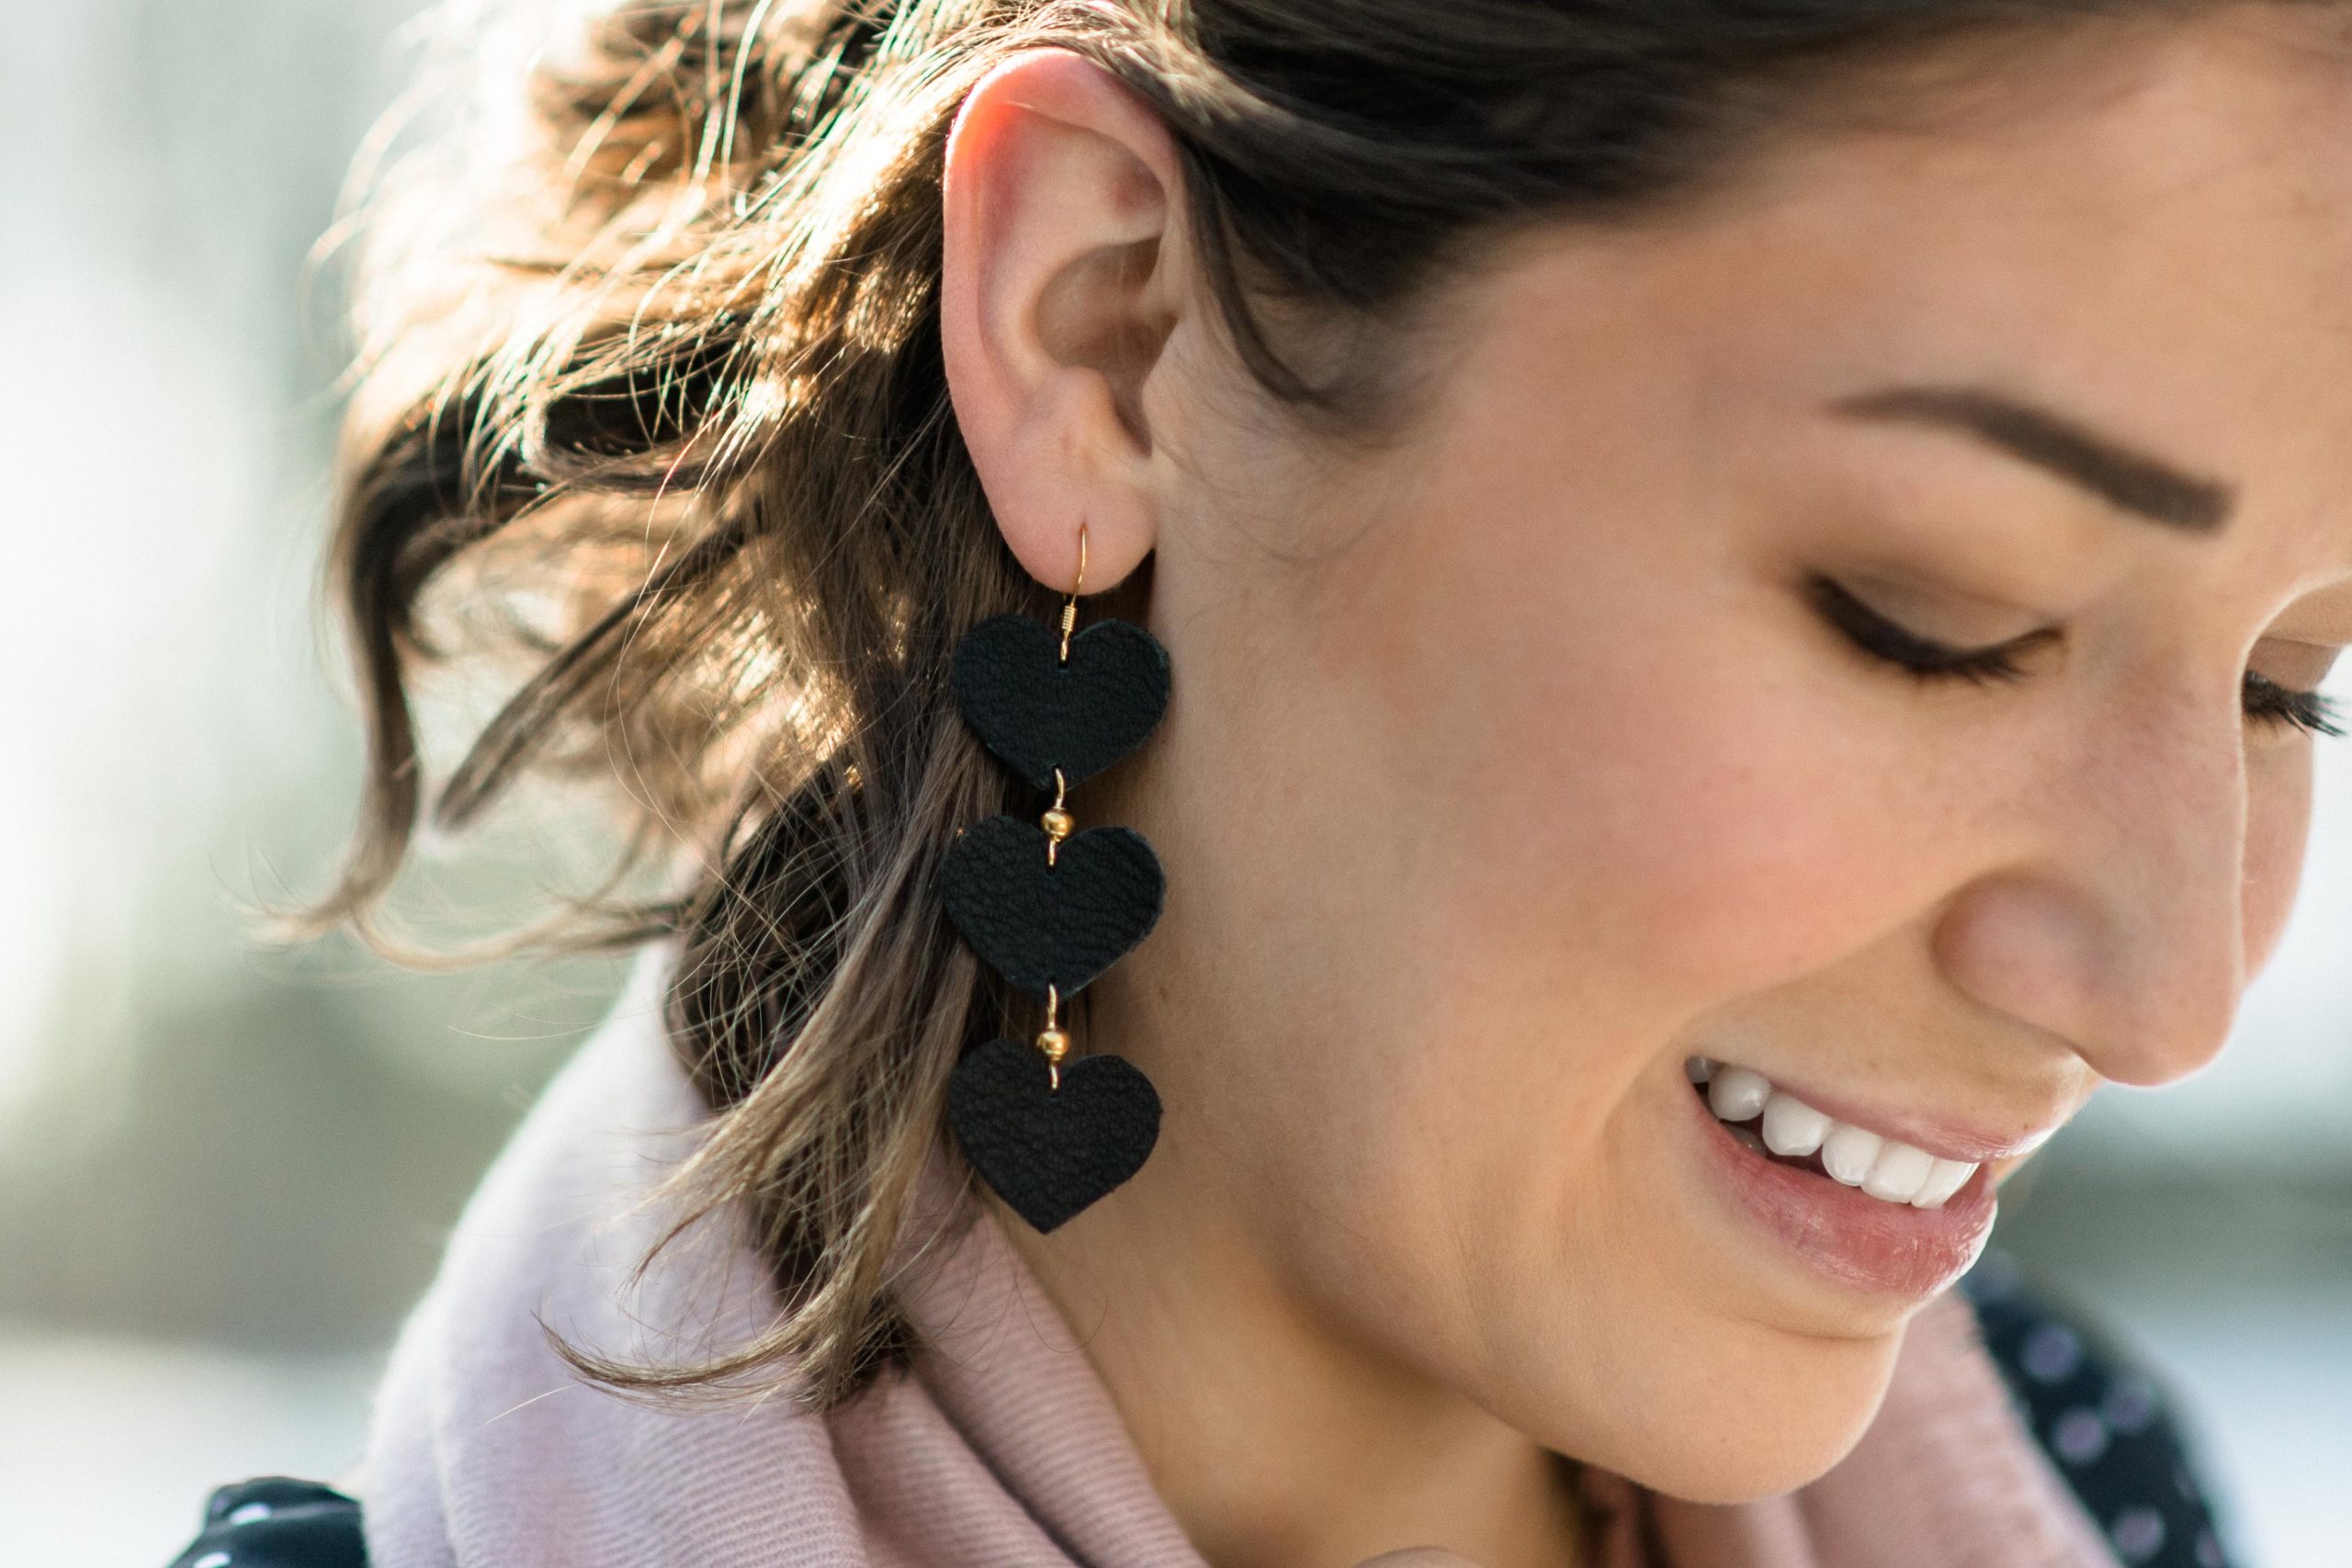
**I am wearing the alternate version in the image above**


**Disclaimer: This blog post contains affiliate links. If you use them, I may be rewarded or make a commission from the sale. Please note that I only recommend tools that I personally use and love and I always have my readers’ best interest at heart.**
SUPPLIES NEEDED:
+ Black Leather
+ Earring Findings
I used gold plated earring findings because my ears get infected really easily, but you can use whatever backs you’d like. I linked a couple options..
TOAOB 100pcs Earring Hooks Ear Wires with Ball and Coil K-Gold Tone Hypo Allergenic Fish Earring Hooks 18mm for DIY Jewelry Findings+ 12 4mm Gold Jump Rings
Beadaholique JR/032X4/G 100-Piece Open Jump Rings, 4mm, 20-Gauge, 22K Gold Plated+ Exacto Knife
Fiskars 167110-1001 Heavy Duty Die Cast Craft Knife, 8 Inch+ Needle Nose Pliers
SUNNYCLUE 3pcs Jewelry Pliers Tool Set Professional Precision Pliers for DIY Jewelry Making – Side Cutting Pliers, Long Chain Nose Pliers with Cutter, Round Nose Pliers, Pink+ 1/16 Inch Hole Punch
Fiskars 1/16 Inch Hand Punch, Circle+ Red Pen

This is the leather that I used and I think I could get about 7 pairs of earrings out of it.
Realeather 2-3 oz. Smooth Full Grain Leather, Black
Step 1.
Cut out a heart that is about 1 inch wide. If you have a Cricut like me, my exact measurements were 0.978″ wide x 0.777″ tall.

Step 2.
Use a red pen to trace around your heart. Make sure that your heart does not move while you are tracing. I found that it’s easier to trace on the smooth side of your leather.

Your tracing should look something like this. It is really faint, but that will be better if you don’t get a perfect cut so the red will not show through.

Step 3.
Cut out your heart using an exacto knife. It’s easiest if you take it slow and use multiple cuts to get through the leather.

Step 4.
Trim off all of the loose leather from around your heart to make sure it’s clean.

Step 5.
Repeat steps 2 through 4 to cut out a total of 6 hearts.

Step 6.
Using your hole punch, put top and bottom holes in four of your hearts, and a single top hole in the other two hearts. It’s best to keep these holes really close to the edge since the jump rings we are using are really small.
**Make sure your holes are centered so your earrings will fall the right way**

Step 7.
Starting with one of the hearts with only a top hole, insert a jump ring into the opening and close it. You will need to use bottle nose pliers for this step.

Step 8.
Attach a jump ring into the bottom of one of your hearts and close it. Using another ring, attach the bottom of this heart to the top of your first one. Make sure both hearts have the smooth leather facing the same way.

Step 9.
Attach the third heart using three more rings and make sure it is facing the same way as the other two.

Step 10.
Attach one of your earring findings directly into the top of your third heart and close the ring. One of your earrings is now complete!

Step 11.
Repeat steps 7 through 10 and complete the second earring.

Good Job!
Now you have an adorable set of earrings! Let me know what you thought of the tutorial and send me pictures if you tried it out!
If you would like the alternate version of these earrings keep scrolling…

ALTERNATE INSTRUCTIONS
In addition to the supplies for the main tutorial you will need these supplies. The only ones you will not need are the jump rings.
SUPPLIES:
+ 4 Gold Eye Pins
+ 4 Gold Round Beads (Really, any color will work)
LolliBeads (R) Gold Plated Smooth Round Metal Beads 4 mm 600 Pcs
+ Round Nose Pliers
Beadthoven 1Set Round Nose Pliers Jewelry Tools for Memory Wire Looping Wrapping Beading Platinum Color 12.7cm/5 Inch Long+ Wire Cutting Pliers
LiQunSweet Stainless Steel Side Cutting Chains Memory Wire Cutter Handy Jewelry Cutting Pliers for Jewellery Making – 11cm/4.33 inch
This version picks up after step 5.

Step 6.
Insert one of your eye pins into one of the hearts with only a top hole.

Step 7.
Put a bead onto the pin.

Step 8.
Using your round nose pliers, bend the pin just above the bead.

Step 9.
Positioning the round pliers to about the same thickness as the eye on the end of the pin, bend the pin back around the pliers to create a ring on the top that is about the same size as the eye on the bottom. Cut the rest of the pin off.

Step 10.
Insert the pin onto the bottom of one of your hearts that has both holes and close the pin. Make sure both hearts are facing the same way.
Step 11.
Repeat steps 6 through 10 for the top heart.

Step 12.
Attach one of your earring findings directly into the top hole of the top heart and close the ring.

Step 13.
Repeat steps 6 through 12 to complete the second earring.
And you’re done! Good Job!
Thank you for reading! Please comment below and let know what you thought about this tutorial and if you’d like me to make more like it.
♥ Natasha
⬇⬇ Here are some images for you to pin!! ⬇⬇


